


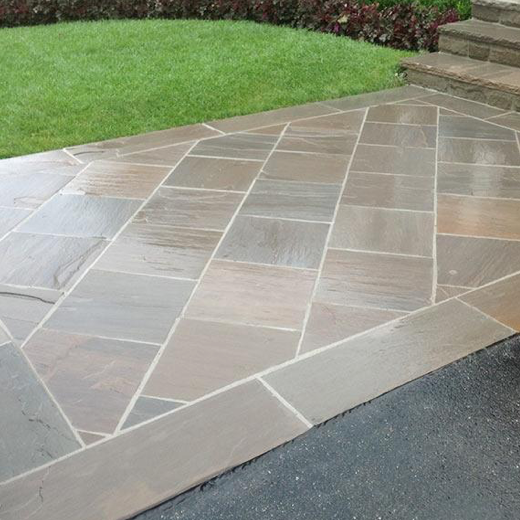


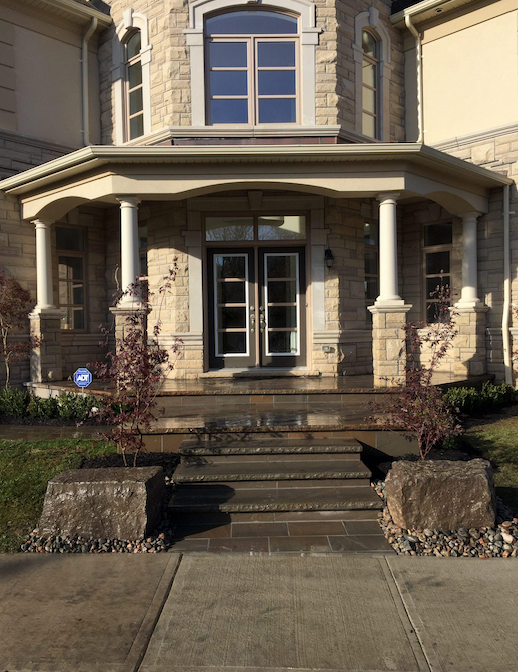


Porch Corner - Slate Grey Sandstone - Outside Rockfaced, Inside Sawn - 2"x12"x24"
VOLUME DISCOUNT GRID
Add to Cart for Additional Discount Based on Total Cart Value (Excluding Tax and Freight):
- Spend Over $5k get 5% Off
- Spend Over $10k get 6% Off
- Spend Over $15k get 7% Off
- Spend Over $20k get 8% Off
- Spend Over $25k get 9% Off
- Spend Over $30k get 10% Off
- Spend Over $35k get 11% Off
- Spend Over $40k get 12% Off
- Spend Over $45k get 13% Off
- Spend Over $50k get 14% Off
- Spend Over $55k get 15% Off
PRODUCT INFO
For projects that need a crisp architectural look at every corner, Porch Corner - Slate Grey Sandstone delivers a clean, rockfaced outside edge with a sawn interior return.
Design & Surface Character
Natural tonal movement and subtle texture give the surface a premium, architectural read across full installs. Outside edges are rockfaced for character and depth; inside edges are precision sawn — purpose-built to wrap exterior corners cleanly where coping meets at 90 degrees.
Material Performance
- Exterior-grade durability for freeze/thaw climates when installed over a proper base with drainage.
- Inside sawn edges ensure a tight, accurate 90-degree return with consistent reveal across the corner.
- Natural variation is expected and part of the premium character; sort and blend during install for the best run.
- Specify appropriate jointing, edge restraint, and bedding to match the application and traffic load.
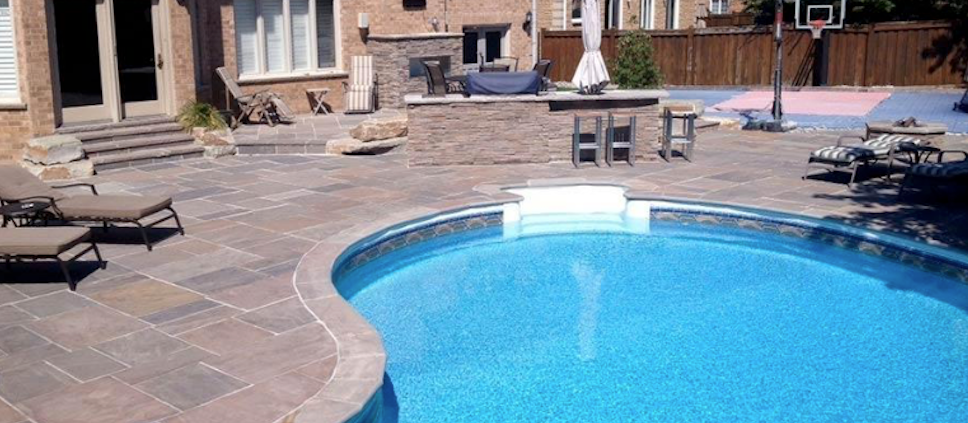
Applications
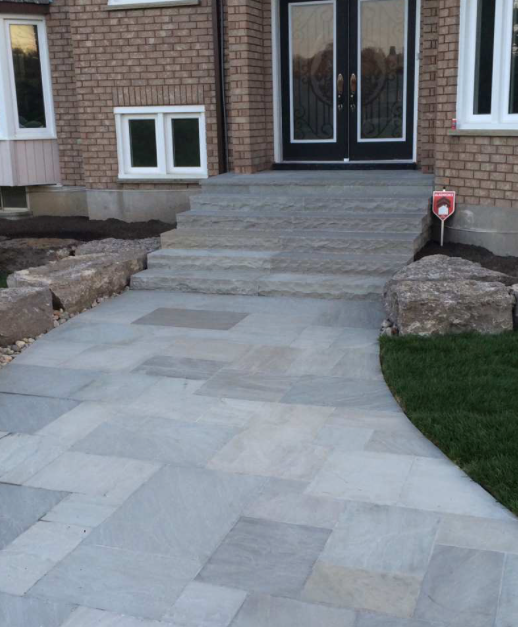
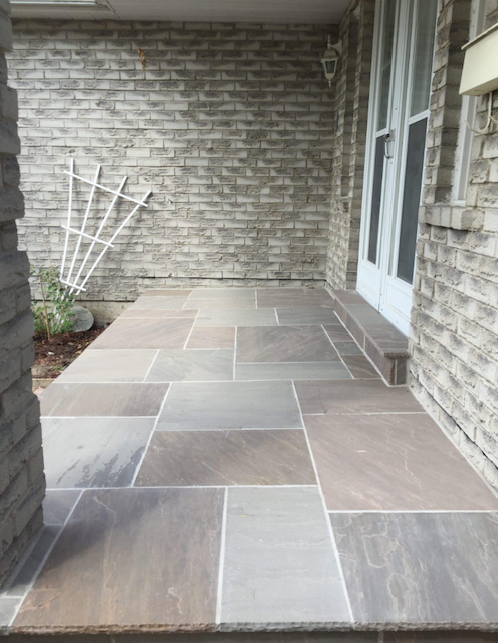
- Exterior porch perimeters
- Entry step surrounds
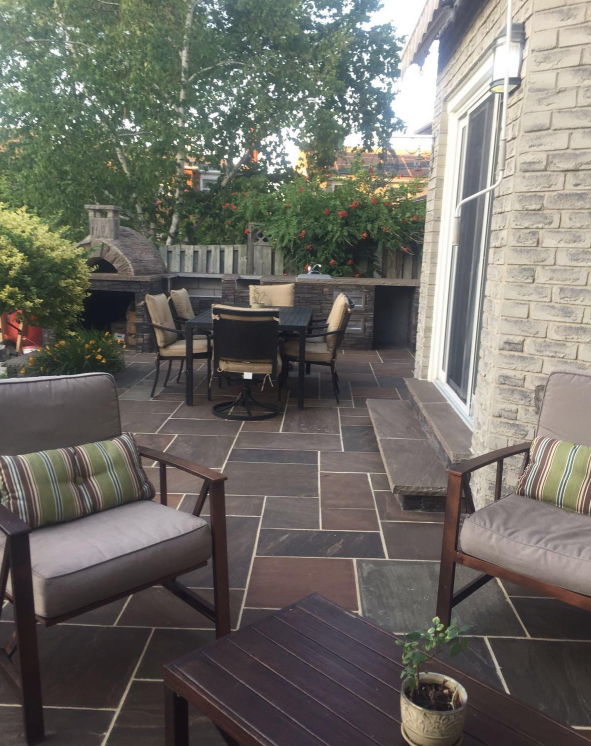
- Corner detailing on raised patios
- Seat wall and garden wall corners
- Outdoor kitchen surrounds
Contractor tip: Install corner pieces first to set your reveals, then run field coping to meet them — it's the fastest way to a clean, consistent 90-degree return.
Closing: Designed to meet contractor expectations while giving designers the crisp, finished look clients notice.
OTHER Items (from this collection)
- Bullnose Coping 2"x12"x48"
- Coping 2"x12"x48"
- Coping 2"x12"x60"
- Coping 2"x12"x72"
- Coping 2"x12"x84"
- Coping 2"x12"x96"
- Coping 2"x14"x48"
- Coping 2"x14"x60"
- Coping 2"x14"x72"
- Coping 2"x14"x84"
- Coping 2"x14"x96"
- Coping 2"x16"x48"
- Coping 2"x16"x60"
- Coping 2"x16"x72"
- Coping 2"x16"x84"
- Coping 2"x16"x96"
- Curb 6"x6"x32"
- Curb 6"x6"x48"
- Curb 7"x6"x48"
- Edge Paver 1"x12"x36"
- Jumbo Slab 2"x24"x48"
- Jumbo Slab 2"x24"x72"
- Jumbo Slab 2"x36"x48"
- Paver 1"x12"x12"
- Paver 1"x12"x18"
- Paver 1"x12"x24"
- Paver 1"x18"x18"
- Paver 1"x18"x24"
- Paver 1"x24"x24"
- Paver 1"x24"x36"
- Pier Cap 3"x24"x24"
- PierCap 3"x28"x28"
- PierCap 3"x30"x30"
- Pool Corner 2"x12"x24"
- Rebate Coping 2"x12"x48"
- Riser 1"x7"x36"
- Step 6"x12"x48"
- Step 6"x12"x60"
- Step 6"x12"x72"
- Step 6"x14"x48"
- Step 6"x14"x60"
- Step 6"x16"x48"
- Step 6"x16"x60"
- Step 7"x12"x48"
- Step 7"x12"x60"
- Step 7"x14"x48"
- Step 7"x16"x48"
- Wall Coping 2"x12"x60"
- Wall Coping 2"x14"x60"
Choose options
- Bullnose Coping 2"x12"x48"
- Coping 2"x14"x84"
- Edge Paver 1"x12"x36"
- Paver 1"x24"x36"
- Step 6"x14"x60"
- Bullnose Pool Corner 2"x12"x24"
- Coping 2"x14"x96"
- Jumbo Slab 2"x24"x48"
- Pier Cap 3"x24"x24"
- Step 6"x16"x48"
- Coping 2"x12"x48"
- Coping 2"x16"x48"
- Jumbo Slab 2"x24"x72"
- PierCap 3"x28"x28"
- Step 6"x16"x60"
- Coping 2"x12"x60"
- Coping 2"x16"x60"
- Jumbo Slab 2"x36"x48"
- PierCap 3"x30"x30"
- Step 7"x12"x48"
- Coping 2"x12"x72"
- Coping 2"x16"x72"
- Paver 1"x12"x12"
- Rebate Coping 2"x12"x48"
- Step 7"x12"x60"
- Coping 2"x12"x84"
- Coping 2"x16"x84"
- Paver 1"x12"x18"
- Riser 1"x7"x36"
- Step 7"x14"x48"
- Coping 2"x12"x96"
- Coping 2"x16"x96"
- Paver 1"x12"x24"
- Step 6"x12"x48"
- Step 7"x16"x48"
- Coping 2"x14"x48"
- Curb 6"x6"x32"
- Paver 1"x18"x18"
- Step 6"x12"x60"
- Wall Coping 2"x12"x60"
- Coping 2"x14"x60"
- Curb 6"x6"x48"
- Paver 1"x18"x24"
- Step 6"x12"x72"
- Wall Coping 2"x14"x60"
- Coping 2"x14"x72"
- Curb 7"x6"x48"
- Paver 1"x24"x24"
- Step 6"x14"x48"
- Bullnose Coping 2"x12"x48"
- Paver 1"x12"x18"
- Bullnose Pool Corner 2"x12"x24"
- Paver 1"x12"x24"
- Coping 2"x12"x48"
- Paver 1"x18"x18"
- Coping 2"x12"x60"
- Paver 1"x18"x24"
- Coping 2"x12"x72"
- Paver 1"x24"x24"
- Coping 2"x12"x84"
- Paver 1"x24"x36"
- Coping 2"x12"x96"
- Pier Cap 3"x24"x24"
- Coping 2"x14"x48"
- PierCap 3"x28"x28"
- Coping 2"x14"x60"
- PierCap 3"x30"x30"
- Coping 2"x14"x72"
- Rebate Coping 2"x12"x48"
- Coping 2"x14"x84"
- Riser 1"x7"x36"
- Coping 2"x14"x96"
- Step 6"x12"x48"
- Coping 2"x16"x48"
- Step 6"x12"x60"
- Coping 2"x16"x60"
- Step 6"x12"x72"
- Coping 2"x16"x72"
- Step 6"x14"x48"
- Coping 2"x16"x84"
- Step 6"x14"x60"
- Coping 2"x16"x96"
- Step 6"x16"x48"
- Curb 6"x6"x32"
- Step 6"x16"x60"
- Curb 6"x6"x48"
- Step 7"x12"x48"
- Curb 7"x6"x48"
- Step 7"x12"x60"
- Edge Paver 1"x12"x36"
- Step 7"x14"x48"
- Jumbo Slab 2"x24"x48"
- Step 7"x16"x48"
- Jumbo Slab 2"x24"x72"
- Wall Coping 2"x12"x60"
- Jumbo Slab 2"x36"x48"
- Wall Coping 2"x14"x60"
- Paver 1"x12"x12"